With the "Create Company" button in the toolbox, a new company is added.
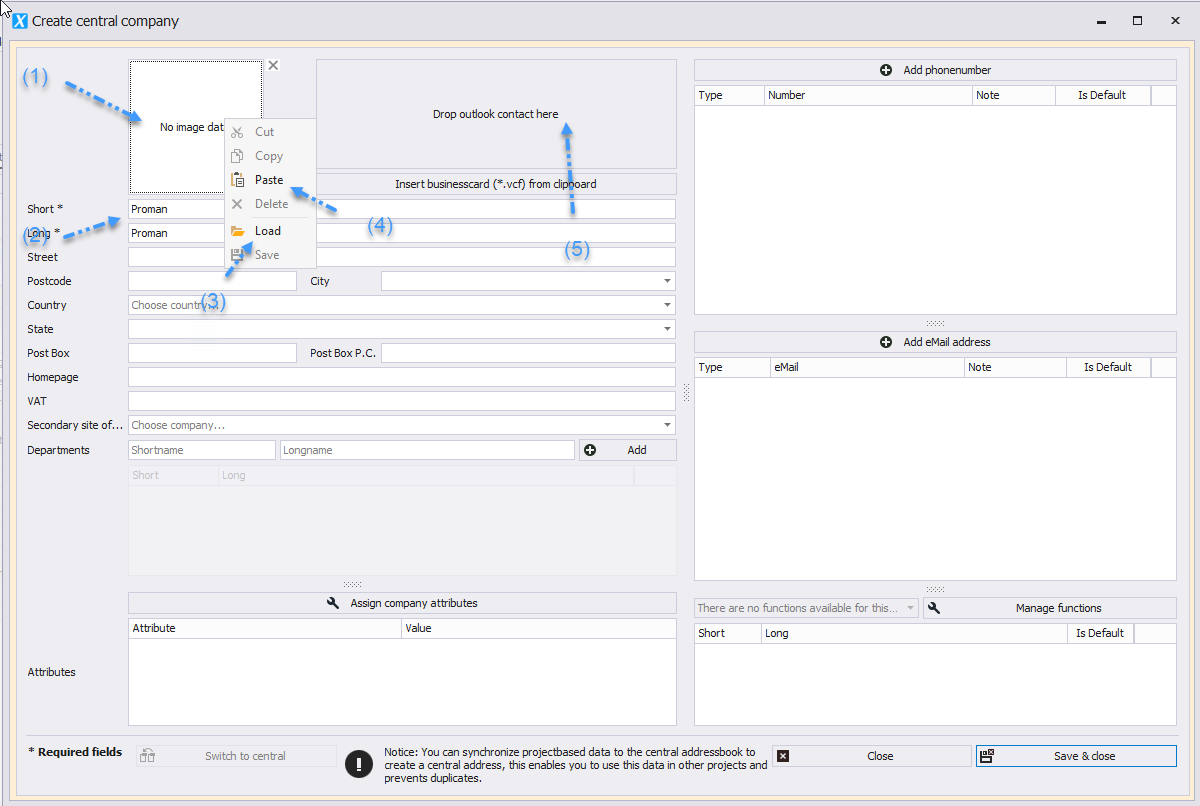
 * A company logo can be added via drag and drop (1)\* ([Drag & Drop in Proman: Instructions](https://op.proman.at/projects/proman-besprechungsbericht/wiki/drag-and-drop-in-proman-anleitung)) or by right-clicking in the menu with "Paste" / "Load" (4)/(3). Supported formats: jpg, gif, or png.
* After creating the company, employees can be imported from Outlook using the .vcf file (5).
* The company name (2) is a required field, and the company short form is unique and can only be assigned once, e.g., PROMAN for PROMAN Software.
* A company logo can be added via drag and drop (1)\* ([Drag & Drop in Proman: Instructions](https://op.proman.at/projects/proman-besprechungsbericht/wiki/drag-and-drop-in-proman-anleitung)) or by right-clicking in the menu with "Paste" / "Load" (4)/(3). Supported formats: jpg, gif, or png.
* After creating the company, employees can be imported from Outlook using the .vcf file (5).
* The company name (2) is a required field, and the company short form is unique and can only be assigned once, e.g., PROMAN for PROMAN Software.
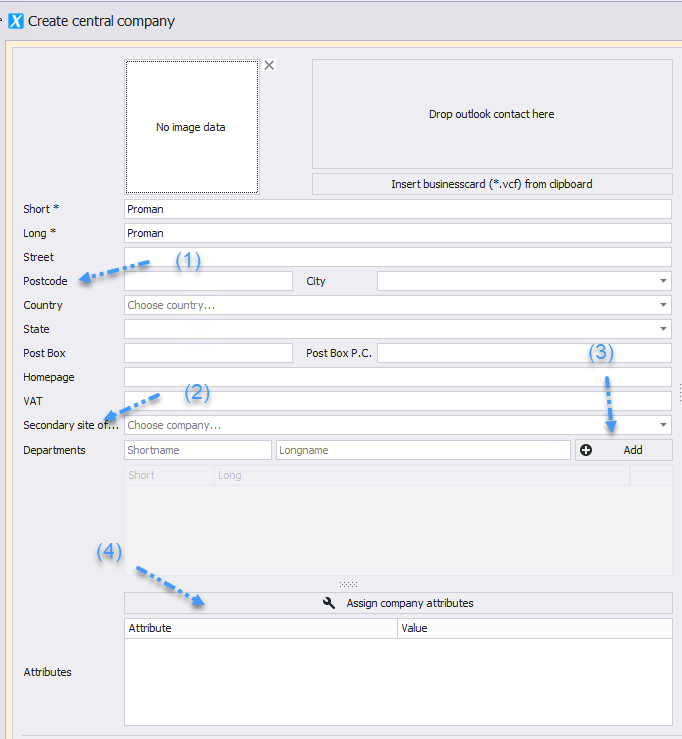
 * Address information (1) is optional. If a company is selected under "Subsidiary of" (2), it will be listed in the printout.
* Departments with short and long forms. Use "Add" (3) to assign a department. The department will appear for selection with the associated employees.
* Various attributes (4) can be assigned to a company. These are created in the toolbox using the "Manage Attributes" button ([06\. Attributes](https://op.proman.at/projects/proman-besprechungsbericht/wiki/06-attribute)).
* Address information (1) is optional. If a company is selected under "Subsidiary of" (2), it will be listed in the printout.
* Departments with short and long forms. Use "Add" (3) to assign a department. The department will appear for selection with the associated employees.
* Various attributes (4) can be assigned to a company. These are created in the toolbox using the "Manage Attributes" button ([06\. Attributes](https://op.proman.at/projects/proman-besprechungsbericht/wiki/06-attribute)).
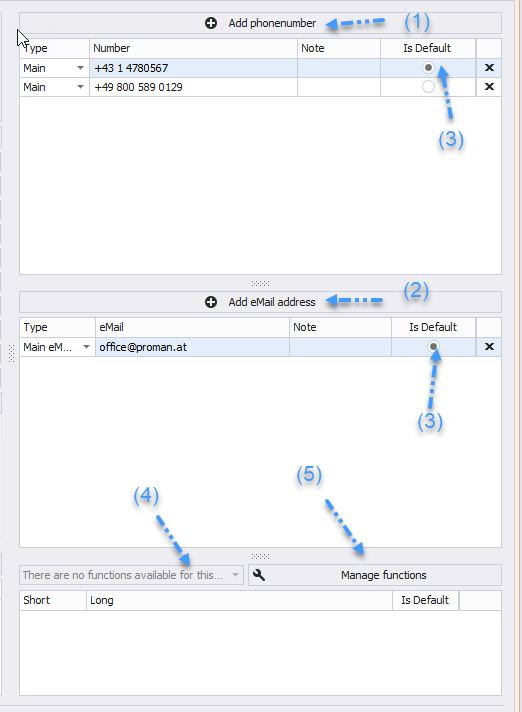
 * The phone number (1) and email address (2) defined as "Is Standard" (3) are displayed in the printout.
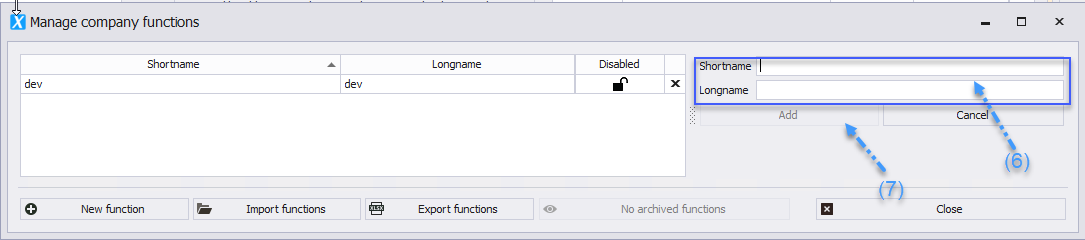
* Different functions can be added to the company via the dropdown menu (4). Under Manage Functions (5), more functions with short and long forms (6) can be added (7).
* Click "Save & Close" to apply the entries and save the company.
* The phone number (1) and email address (2) defined as "Is Standard" (3) are displayed in the printout.
* Different functions can be added to the company via the dropdown menu (4). Under Manage Functions (5), more functions with short and long forms (6) can be added (7).
* Click "Save & Close" to apply the entries and save the company.
 * To create an employee, select the corresponding company in the Central Address Book (1) and add an employee via the menu bar using the "Create Employee" button (2).

